说明
Handler 是Android提供的一个用于处理消息与可运行对象的组件,它有两个功能:
- 将消息与可运行对象在安排在未来某个时间点运行
- 在其它线程上操作队列
为什么提供Handler机制
Android在启动后会有一个主线程,它不允许子线程去改变主UI线程的内容,为了防止一些耗时操作导致主UI线程无响应而闪退,是Android提供的一种保护机制。在现实中确实有一些耗时长的需求使用异步线程,比如调用三方接口,加载完后来刷新UI,这种需要就可以用Android提供的 Handler 机制来实现,可以认为 Handler 是一个与Android主进程的通道
常用方法
sendMessage
发送消息
handleMessage
接收消息
obtainMessage
从全局消息pool获取一个Message对象
post
提交可运行对象,后缀带AtTime表示在指定时间提交,后续带Delayed表示提交延迟运行
removeMessages
移除消息队列中等待中的消息
hasMessages
判断消息队列中是否有某个指定消息
实战
实现一个指定时间切换图片的功能,最终效果如下
页面
<?xml version="1.0" encoding="utf-8"?>
<RelativeLayout xmlns:android="http://schemas.android.com/apk/res/android"
        android:layout_width="match_parent"
        android:layout_height="match_parent"
        android:id="@+id/RelativeLayout1"
        android:gravity="center">

    <ImageView
            android:layout_width="wrap_content"
            android:layout_height="wrap_content"
            android:id="@+id/imgAnimation"
            android:layout_alignParentLeft="true"
            android:layout_alignParentTop="true" />

</RelativeLayout>
代码比较简单,就是一个图片,居中显示
代码逻辑
var imgAnimation: ImageView? = null
var imgstart = 0
val imgids = arrayOf(
    R.drawable.pic1,
    R.drawable.pic2,
    R.drawable.pic3,
    R.drawable.pic4,
    R.drawable.pic5
)

private fun testHandler() {

    setContentView(R.layout.handler_sample)
    imgAnimation = findViewById(R.id.imgAnimation)
    val handler = ImgAnimationHandler()
    Timer().schedule(
        object : TimerTask() {
            override fun run() {
                handler.sendEmptyMessage(101)
            }
        }, 0, 500
    )
}

class ImgAnimationHandler : Handler() {

    override fun handleMessage(msg: Message) {
        if (msg.what == 101) {
            imgAnimation?.setImageResource(imgids[imgstart++ % imgids.size])
        }
    }
}
- 消息处理:主要是新建了一个
ImgAnimationHandler,它覆写了 handleMessage 方法来处理信息,当消息what值=101 时,从 imgids 中顺序选择一个 sourceId 来达到图片切换的效果 - 发送消息:主线程中创建一个Timer的schedule线程每隔 500ms 通过
ImgAnimationHandler发送消息 (what=101)
在子线程中调用Handler
在子线程中调用Handler,需要设置指定 Looper 的Handler(在创建 Handler 时,官方不再建议使用默认的构造函数创建 Handler,而是推荐 传入 Looper 实例作为构建参数的构造函数)
class LooperThread extends Thread {
       public Handler mHandler;

       public void run() {
           Looper.prepare();

           mHandler = new Handler(Looper.myLooper()) {
               public void handleMessage(Message msg) {
                   // process incoming messages here
               }
           };

           Looper.loop();
       }
   }
如上最佳实践
- 使用 Looper.prepare() 来初始化当前线程为一个looper
- 创建 Handler 引用 与当前线程关联的 looper
- 调用 Looper.loop() 执行当前线程的消息队列
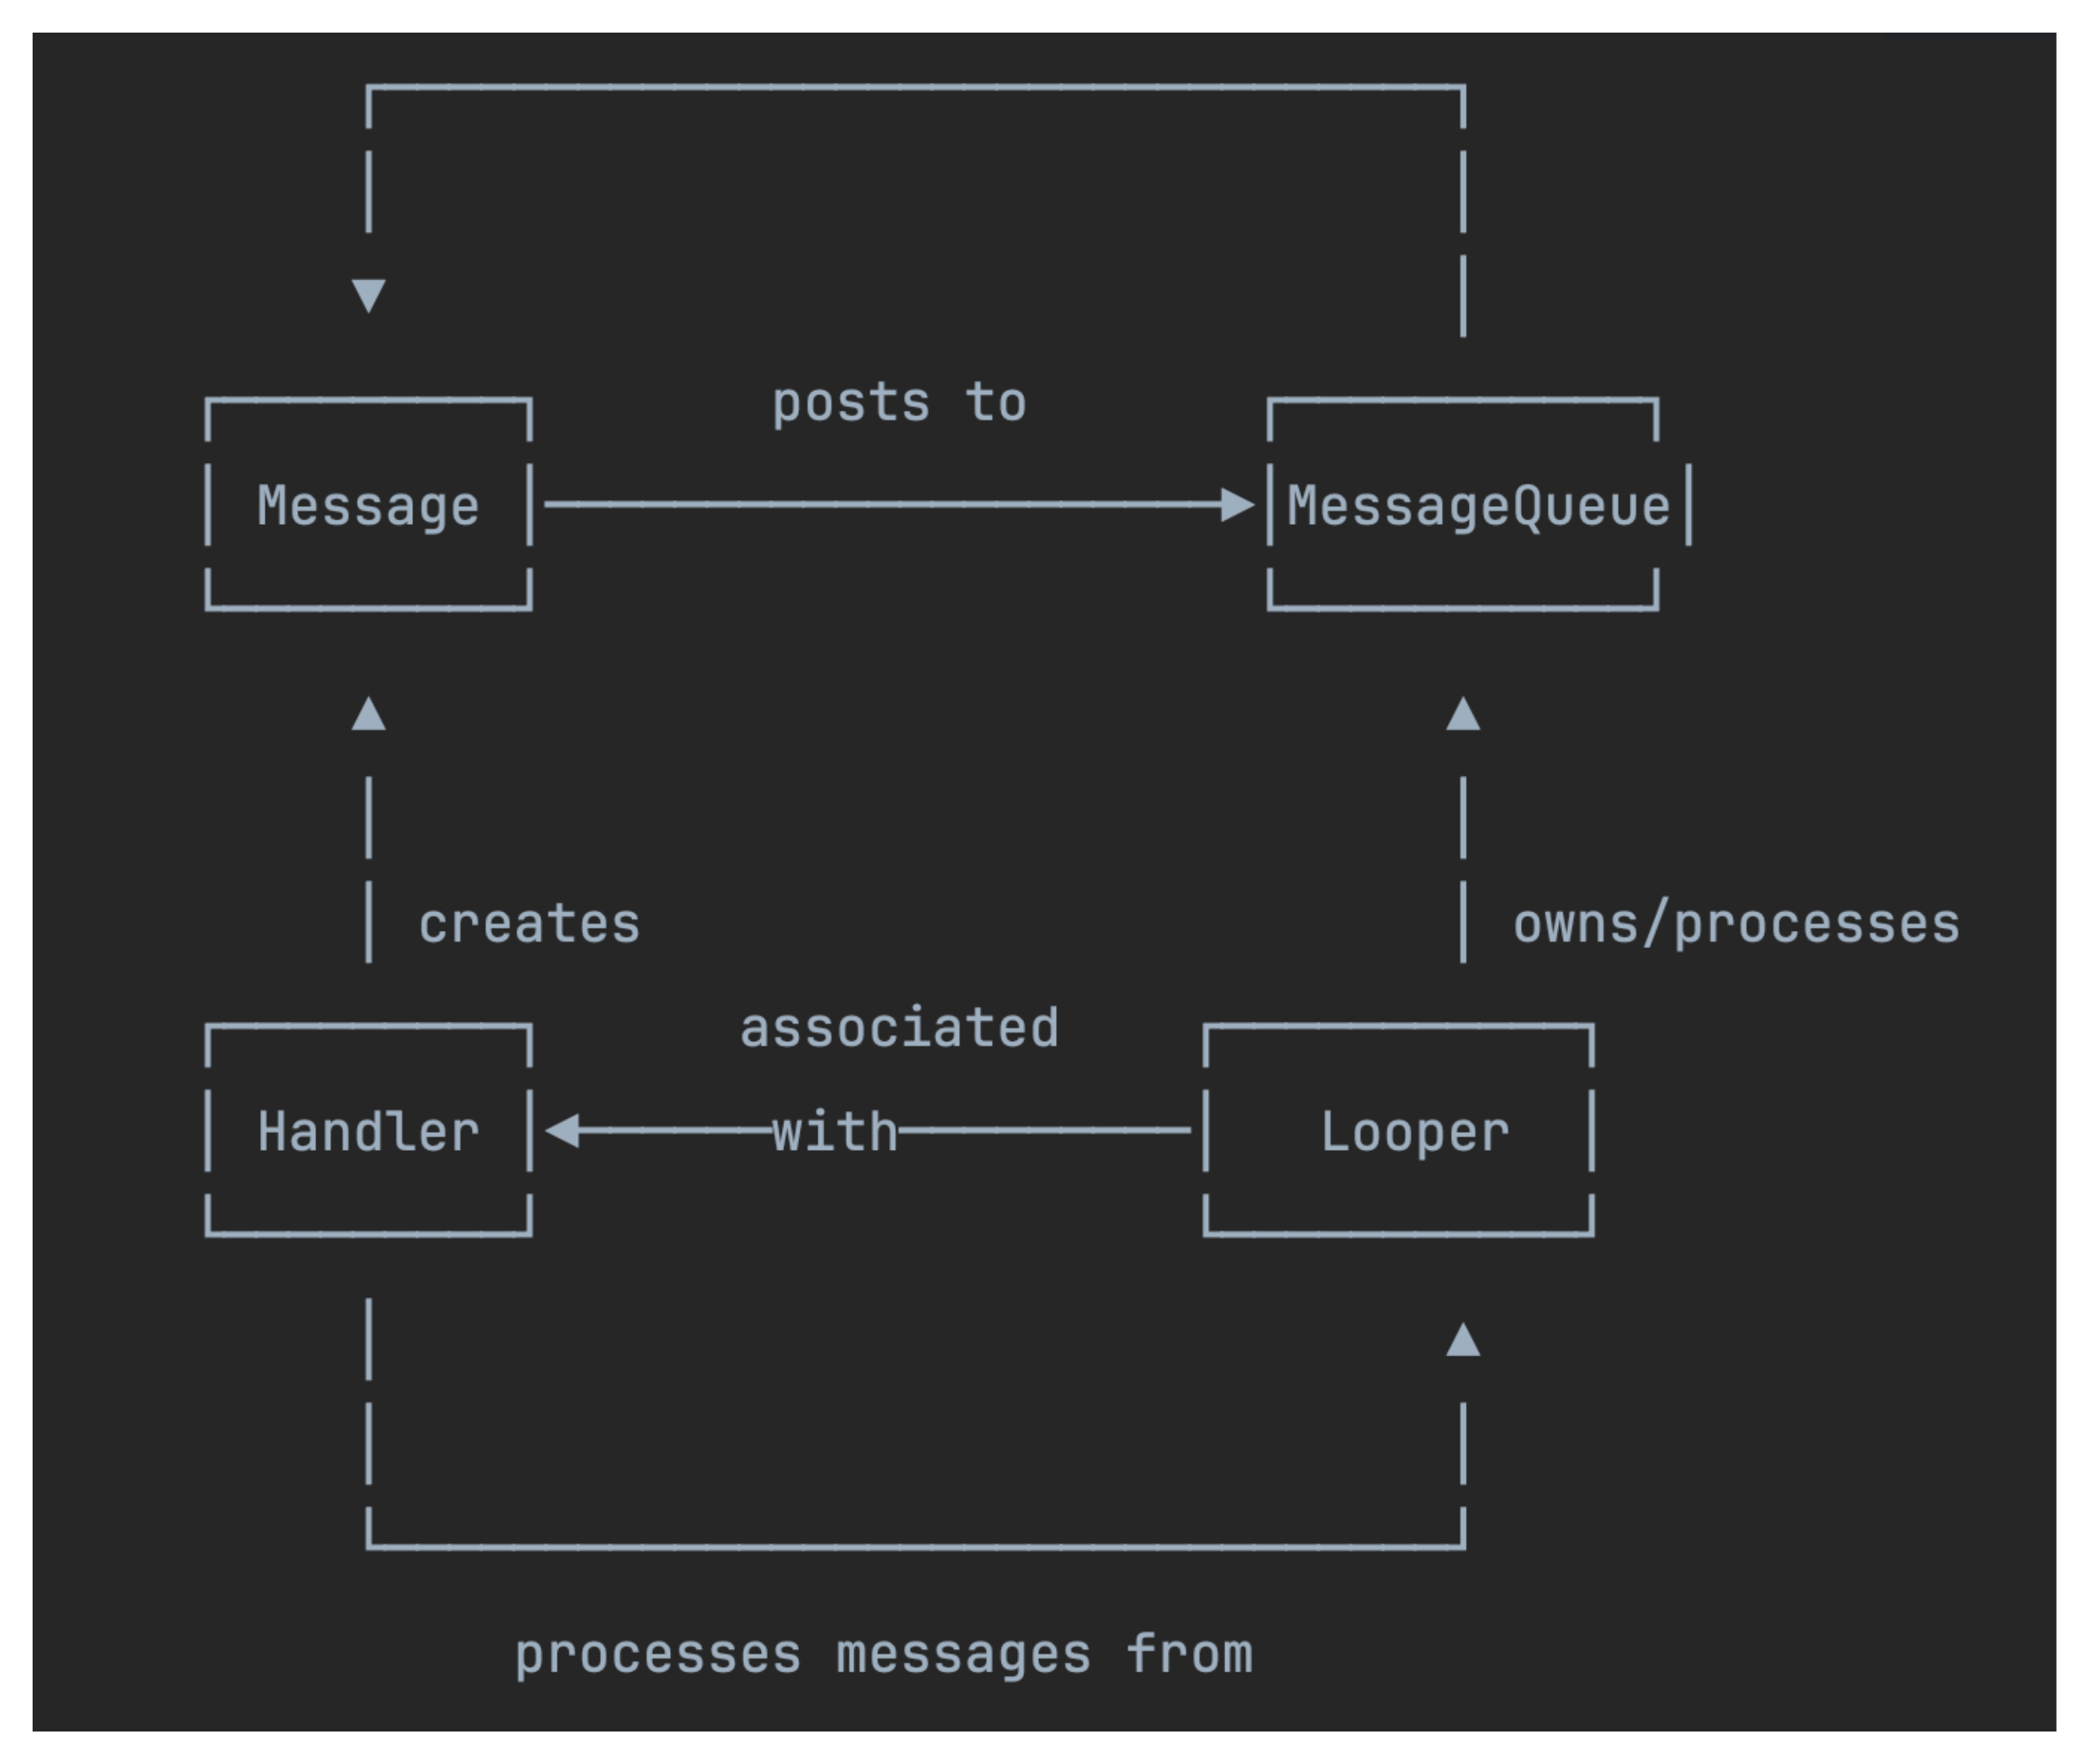
使用 Looper.getMainLooper() 可以方便的将其它线程的任务提交到UI线程